This is the second part of my model rocketry adventure with the Apogee Zephyr kit. See Part 1 here.
When I finished building Zephyress (my Apogee Zephyr-based rocket) back at the end of June, I was excited and nervous in equal measure. I couldn’t help but wonder: Will she fly straight? Will she recover intact? But before I could get anywhere near a launch pad, I needed to make sure she was truly ready. One thing I’ve learned about rocketry, thanks mostly to my job as a GN&C Engineer for the Orion Capsule, is that success starts long before the liftoff!
In the days leading up to launch day, I rehearsed every step at home. I tugged on each fin and fillet, maybe harder than necessary, just for the comfort of feeling everything hold firm. I practiced installing the H100W motor several times, checking the friction fit and the retention cap so there would be no chance of it ejecting under thrust. I also practiced folding the parachute using an "accordion" method to give it the highest chances of reliable deployment. I know that there are other methods out there. But that is the one I felt most comfortable with. As I said in my previous post, RockSim predicted an apogee at 609.6 m (2000 feet) and calculated the optimal ejection delay to be 8.3 seconds. The Aerotech H100W comes with a 14-second delay, so I used the Aerotech delay tool to carefully shave it down.
Once I completed all the checks I finally felt ready for launch.
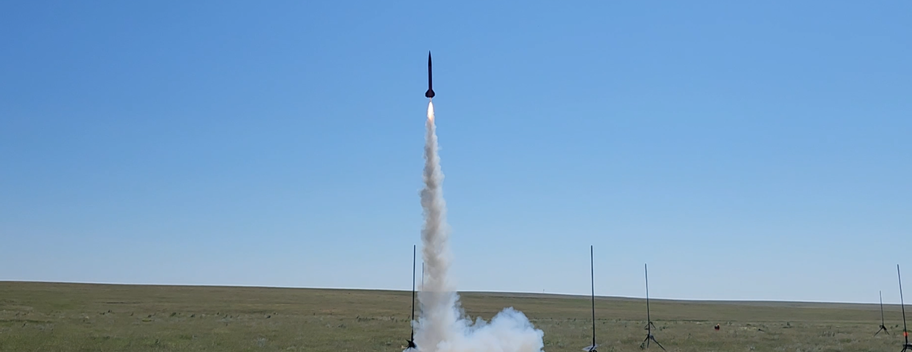
Launch day arrived with a sky so clear and blue it almost looked painted. The wind was low, perfect for flying, though the summer heat at Grassland National Park was intense. My heart was beating a little faster than usual as I checked in and watched the Range Safety Officer inspect Zephyress. With the green light (and help!) from the RSO, I brought the rocket to the launch pad and installed the igniter. The club’s high-power pads use 1010 launch rails, which are far more rigid than traditional rod-based launch systems. Zephyress’s rail buttons slid onto the guide rail very easily and the rocket stood tall and poised to fly!
After the countdown, the H100W ignited instantly with a thunderous roar. Zephyress cleared the rail and was finally airborne!
About two seconds after clearing the pad, I noticed a gentle roll pushing against the wind. It wasn’t dramatic, but I knew it would probably cost a little altitude. Still, she was steady and strong, and I silently counted the seconds until apogee.
Then pop! The ejection charge fired, and the parachute blossomed perfectly. Relief rushed through me the moment I saw the canopy inflate, bright and full against the sky. Zephyress floated down softly, drifting with the breeze, her parachute rustling faintly as it carried her home.
The landing site was less than 200 m from the pad: a gentle touchdown in a grassy field. I couldn’t help but smile as I picked her up. After all the preparation and all the anticipation, she had flown beautifully and come back safe. And just like that, I was officially Level 1 certified.
Watching Zephyress soar and return safely was unforgettable, but words alone can’t capture the sound, the speed, and the energy of the flight. That’s why I put together this short video so you can experience the launch for yourself!
Stay tuned for the data analysis post, where I’ll compare RockSim’s predictions with the actual flight data.
Disclaimer: This post reflects my personal experience. I am not responsible for any damage, injury, or issues that may result from attempting to follow the same steps. Please do your own research and take all necessary safety precautions!